
Post-Armistice shot of Anzac Cove, Hell Spit in the background, with only a couple of wrecked boats to suggest what happened here.

So here’s our cemetery map again, with three squares now marked in blue. All three cemeteries were begun later in the summer of 1915, and complete our look at the Anzac cemeteries created during the campaign that still exist today. The remaining post-war concentration cemeteries, those marked with black squares, will be the subject of our final Anzac post.

Hill 60 – there’s always a Hill 60 – was in Turkish hands until late August 1915, when New Zealand & Australian troops took the position, which would be held for the rest of the year.

Hill 60 is marked in red on this map (not for enlarging), showing its strategic importance at the northern edge of the Anzac hills (Anzac Cove shaded blue), as well as its proximity to the Suvla operations.

View looking north west down the Kaiajik Dere, Turkish trenches on the right on Hill 60, and Australian trenches on the lower slopes to the left. In the background, the Salt Lake at Suvla can be seen, emphasising again how these hills dominated the flatlands between the Anzac beachhead and the later Suvla operations further north, commanding all land-based communication between the two.

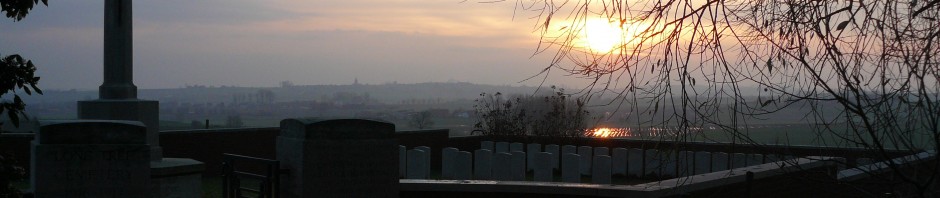
Although staged, this image of an Australian horseman (left) in full flight carrying messages from Suvla to Anzac along the shoreline road under the eyes of the Turkish snipers serves to illustrate the point. The graves, the same as those seen last post (right), were, and indeed are, in Beach Cemetery.

We begin with the New Zealand Memorial within Hill 60 Cemetery (above & below)…

…which commemorates over 180 New Zealand soldiers who died in the Hill 60 fighting, but whose graves have been lost. If they ever had graves.

The cemetery has an unusual design (cemetery plan on the right),…

…best seen in this aerial photo taken in 1923, crosses still in place. Enlarged after the war by the concentration of graves from Norfolk Trench Cemetery and from many battlefield graves, there are now 788 men buried or commemorated here, of whom 712 are unidentified. 34 casualties known or believed to be buried among them are remembered on special memorials.

A mile south west of Hill 60, and only 500 yards from the beaches north of Embarkation Pier, this is 7th Field Ambulance Cemetery at the war’s end,…

…some time later, with added concentrations,…

…and later still, this photograph taken in April 1923.

640 men are now buried or commemorated in the cemetery, of which 276 are unidentified, special memorials remembering 207 of them. On the right, the cemetery plan.

Although named after the 7th Australian Field Ambulance, which landed on Gallipoli in September 1915,…

…the majority of burials in the cemetery are British, the cemetery being greatly enlarged post-war as men were brought here from a dozen smaller cemeteries, including…

…Suffolk Cemetery…

…Junction Cemetery & Norfolk Cemetery,…

…Northampton Cemetery,…

…West Ham Cemetery & Australia Cemetery,…

…Aghyl Dere Cemetery & Essex Cemetery,…

…1/6th Essex Cemetery & 1/8th Hants Cemetery,…

…and East(ern) Mounted Brigade Cemetery.

All subsequently removed from the face of the earth, the bodies reburied here in 7th Field Ambulance Cemetery.

At which point here’s our list of the original Anzac cemeteries, the inset showing a post-evacuation view of a snowy Anzac Cove.

The final wartime cemetery at Anzac, this is Lone Pine Cemetery at the end of the war. Lone Pine was a plateau where, as you will see, the front-line trenches were often mere yards apart. Originally containing just 46 graves,…

…the cemetery is shown here after some, at least, of the concentration burials (foreground) have been brought in from elsewhere in the succeeding months,…

…and here in an aerial shot taken in 1923. Trenches still honeycomb the landscape.

Today, the cemetery is also the site of the Lone Pine Memorial, which commemorates nearly 5,000 Australians & New Zealanders who died in the Anzac area, including those who died and were buried at sea in Gallipoli waters, who have no known grave.

Scaffolding surrounds the memorial at Lone Pine Cemetery as workers manoeuvre the huge stone blocks used in its construction.

Later views, from 1936, of both the memorial (left) & cemetery (right). The wartime cemetery was enlarged after the war when the several hundred graves from Brown’s Dip Cemetery were moved here, along with other men originally buried on the battlefield.

Today, 1,167 men are buried or commemorated here, just over 500 of whom are unidentified, and 183 special memorials remember men known or believed to have been buried either here or at Brown’s Dip. The tree on the left, marked ‘PINE’, almost certainly isn’t. The lone one, that is.

Sandbags protect the entrance to a dugout on a barren hillside above Victoria Gully leading up to Lone Pine (left). Further up the slope, wooden crosses mark the graves of dead Australian soldiers interred at the time in a rudimentary cemetery (right).

Aerial view showing the maze of trenches at Lone Pine & Johnston’s Jolly, June 1915. Although the Australians had briefly occupied Lone Pine after the landings on 25th April, the Turks had thereafter turned it into a strongpoint during the early summer.

On 6th August 1915, the Australians attacked the Turkish positions at Lone Pine, succeeding in taking the Turkish front-line trenches and advancing down their communication trenches before Turkish counterattacks stopped their progress. These Australians, killed on 6th August, lie dead on the parapet of a communication trench.

Four days of incessant fighting followed, and although the Turks failed to recapture their trenches, the Australians were prevented from advancing further. Conditions were appalling; the dead were simply left where they fell, or stacked in the trenches and used to block the Turkish communication trenches along with anything else that came to hand. By the end of the action Australian losses amounted to around 2,000 men, Turkish considerably more. This photograph, taken on 8th August, shows more dead – these appear to be Australian too – in one of the Lone Pine trenches.

Australians in captured Turkish trenches at Lone Pine. The attacking Australians were unaware of the pine logs roofing the trenches that you can see in both these shots, and found themselves either firing through small gaps in the logs as the Turks below responded in kind, or engaged in vicious hand-to-hand fighting in the semi-dark beneath. Bayonets, bombs & fists. Seven of them were to earn Victoria Crosses during the action.

Lone Pine Cemetery in the 1960s, with the cemetery plan on the right.

The lone pine? Maybe.

After the war, the graves from a number of small cemeteries were moved to the aforementioned Brown’s Dip Cemetery, before being moved once again to Lone Pine, including those at Victoria Gully No. 1 Cemetery,…

…and Victoria Gully No. 2 (left) & Victoria Gully No. 3 Cemeteries (right).

Looking towards the head of Victoria Gully, with Johnston’s Jolly on the skyline, Lone Pine off to the right, and three cemeteries in view: bottom left, Victoria Gully No. 2; in the depression at the top the two halves of Brown’s Dip Cemetery (known as Brown’s Dip North & South); and partly obscured in the mid-distance on the right, Victoria Gully No. 1.

Soldiers, perhaps saying a final farewell to mates now gone, stroll among the graves at Brown’s Dip Cemetery in December 1915 prior to the evacuation, which began, at Anzac, on 15th December.

Original panoramic view of Brown’s Dip Cemetery. By the end of the Gallipoli campaign, 149 Australians had been buried here.

Another view of Brown’s Dip (left), the two halves clear to see, both in the picture and on the cemetery plan on the right.

Soldiers marking out graves at Brown’s Dip Cemetery in 1919, probably around the time that the graves from the Victoria Gully cemeteries were being moved here.

As mentioned, the four days’ fighting at Lone Pine between 6th & 10th August 1915 resulted in over 2,000 Australian casualties. This cross remembers fifty five of them.
What a super researched article
Although I haven’t been there i am informed that it is a very atmospheric place to visit to remember the absolute folly of military leaders of thr time and absolute arrogance displayed. Keep it up Magic
Cheers Kevin. Appreciated. I will do my best.